How to Create Charcuterie Boards For Gifts
We've made it to day 4 of the twelve days of edible gifts series! And today I'm mixing things up with a savory idea- Charcuterie! Why is this the perfect gift? Let me tell you!

First, it’s super useful (and obviously tasty). It’s super handy to whip this out some Christmas break evening and supper is covered or if the recipient is invited to a party they can throw this in the trunk and off they go!
Second, it’s no bake and you can put together a ton of these boxes in no time.
Third, they are completely customizable and can be made a ton of different ways. You can add a favorite dip or cheeseball, veggies, chocolates, it’s truly endless!
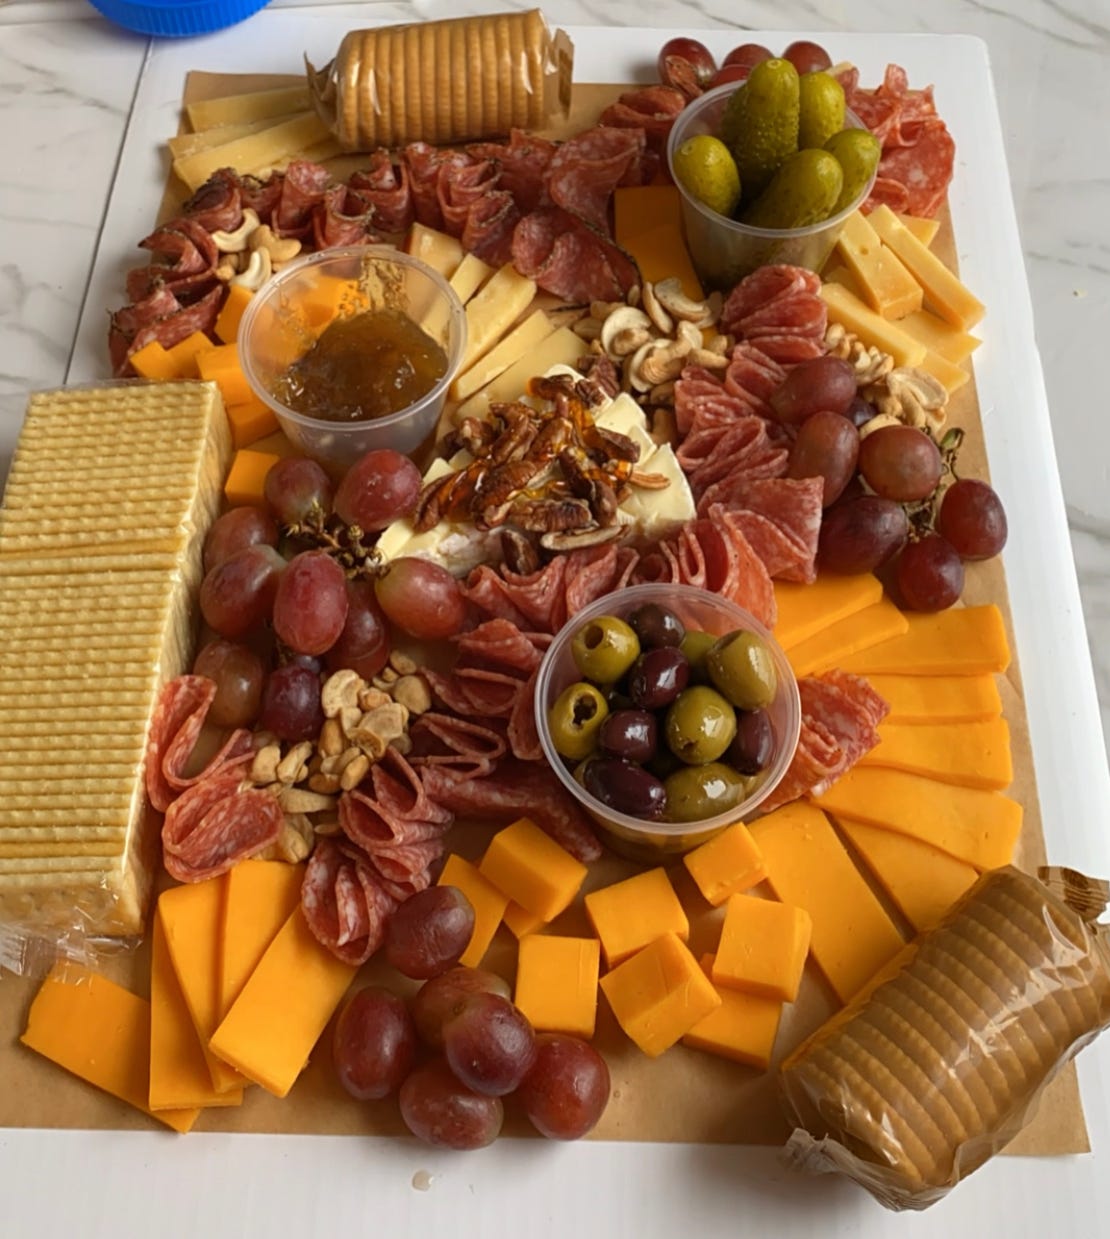
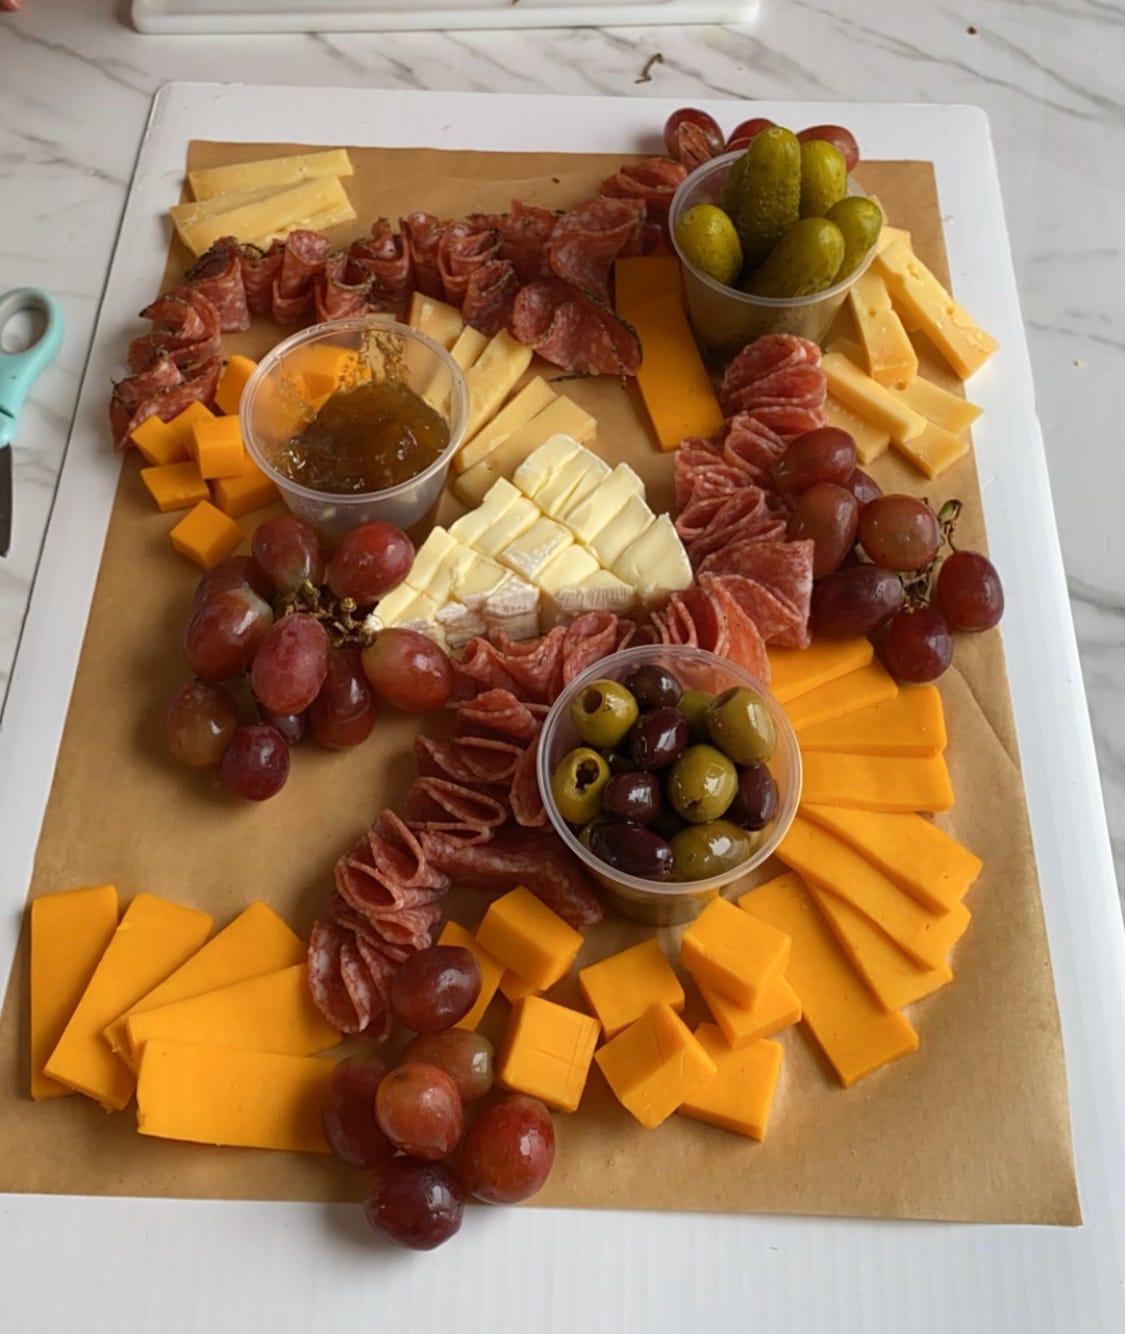
Here’s a quick list of what went on this board and then I’ll share a few tips.
pickles
marinated olives
fig jam
salami (it was a variety pack so there were different types)
cheddar cheese
Gouda
brie (with pecans and hot honey)
grapes
cashews
crackers
fresh rosemary
That’s it! Now for a few tips…
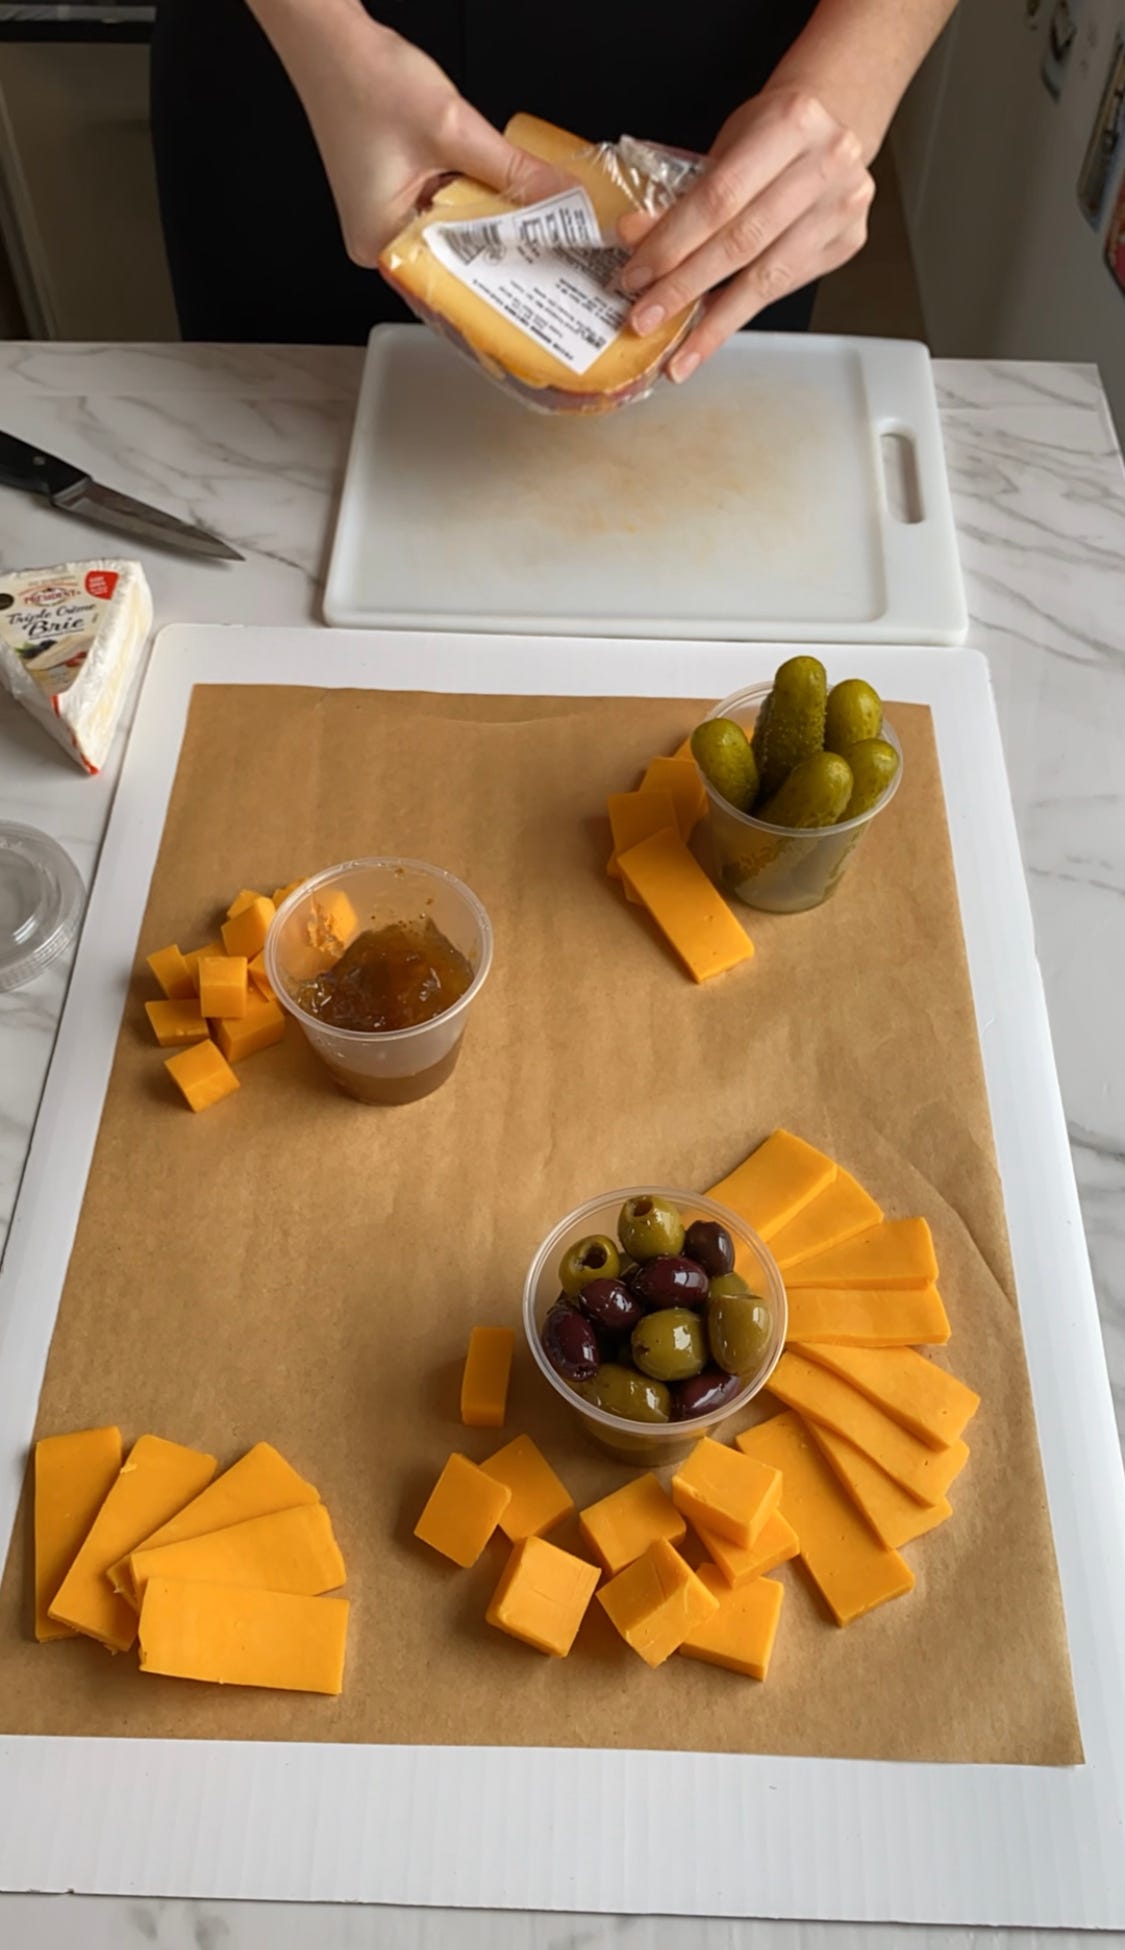
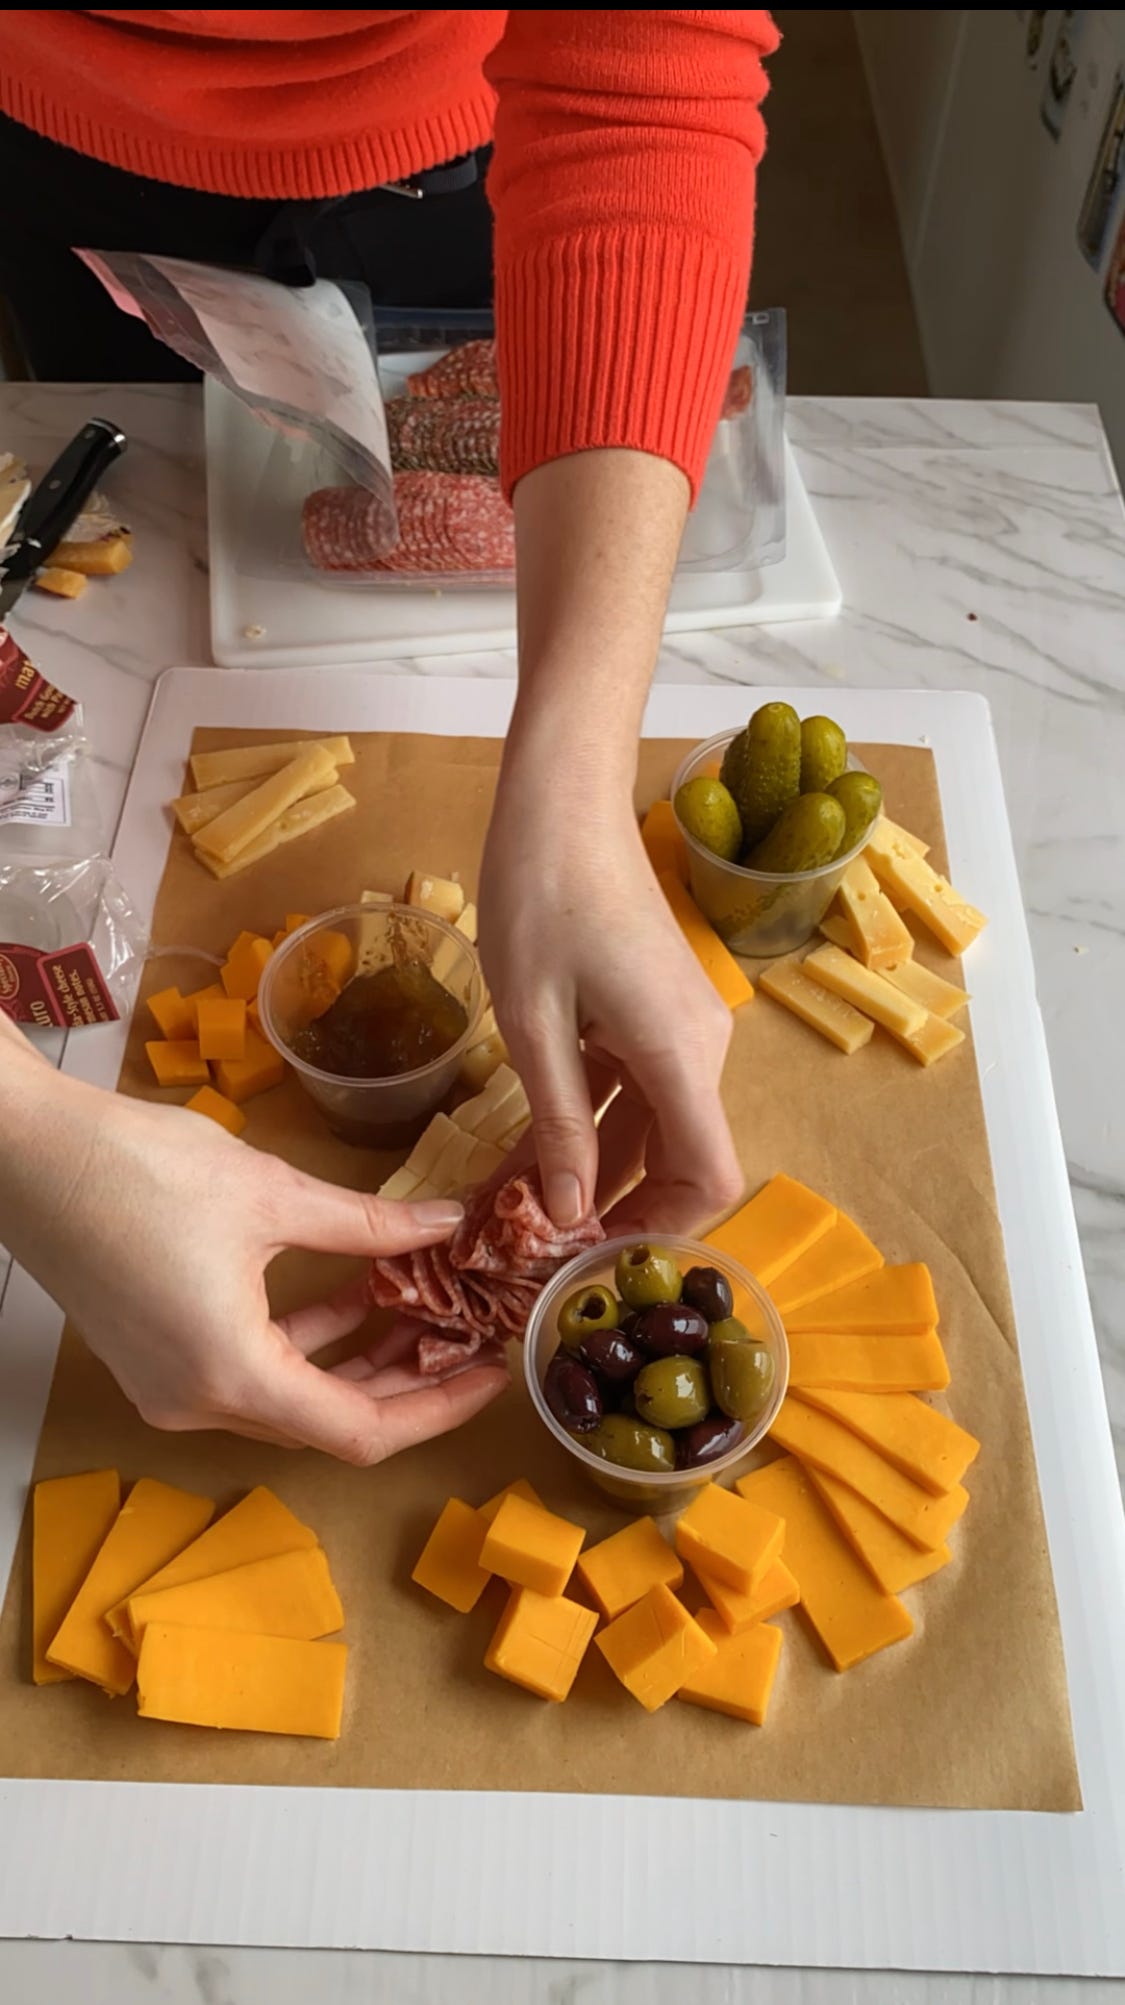
I started with a bakery box and card board rectangle that fits in the bottom. I just picked this up from Walmart. I did the 19” by 14” box. I then put a piece of parchment down so that the box wouldn’t get soggy. I used little containers (also from Walmart) to hold the pickles, fig jam, and olives.

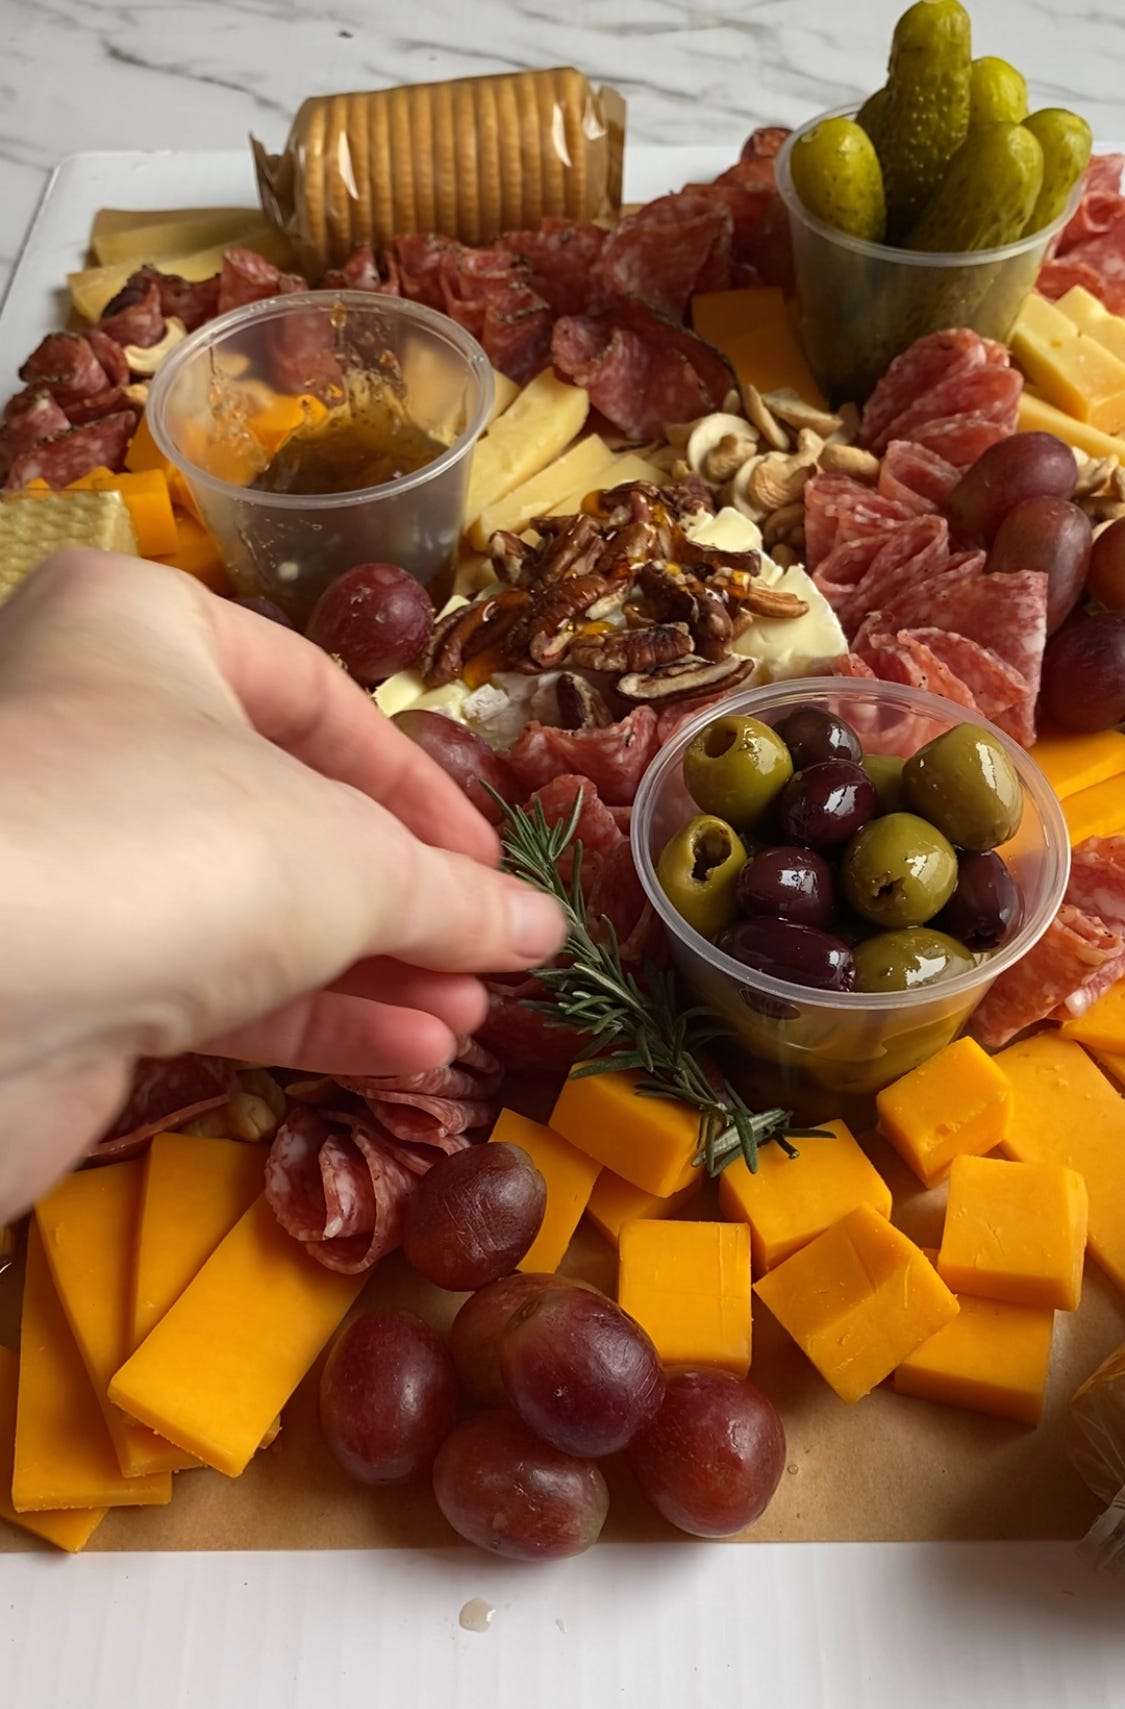
You don’t need a million different types of cheese. One way to make it look more interesting is to cut your cheese a few different ways. Here I cut the cheddar in both slices and cubes to add visual interest.
If you’re feeling stuck look on Pinterest for ideas on how to arrange your board, but generally speaking “s shapes” or curved arrangements look best. I fold the meat into quarters and then stack them together to make the “meat river”

4. Fill in any gaps— I used grapes and nuts to fill in the gaps.
I like to leave the crackers in wrappers so they don’t get soggy.
To finish it off I added a few sprigs of rosemary.